Defend Your Base From Scary Worm How to Beat the Scary Worm
Printers, mortars, a 400 HP door, and the blue unit until every difficulty is dead.
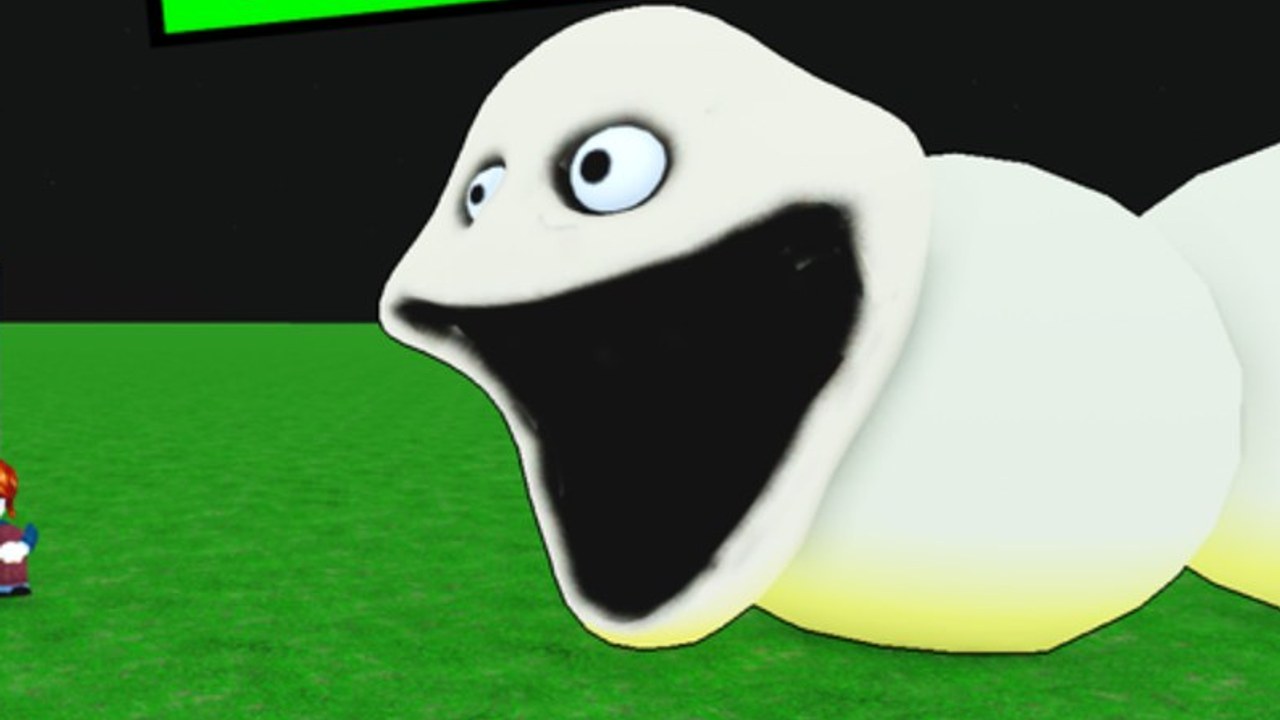
Beating the Scary Worm is a DPS-and-door problem, not a secret-map problem. The cream segmented boss walks a night-grass lane toward a concrete bunker. Official stills show an HP bar around 748k / 999,999. Footage shows it healing while it chews the wooden door. If your printers are late and your repair is later, that bar does not matter — the door hits zero first. This page is the full-clear plan: every difficulty, same bunker rules, escalating shop.
The complete all-levels run (Chaos Cody, July 2026) is the footage this guide follows. It is not a script. It is the order that actually finished the ladder: money printers and farms, mortars as soon as they are affordable, obsessive door repair, rare units when they drop, then a neon-blue damage unit that costs about 16k and hits around 120, then gems into an exclusive crate after the last clear.
Phase 1 — print, then cheap DPS
Do not open a hard difficulty until the getting started habits are automatic. Claim a plot. Starting cash is about 450. Buy a money printer or farm and park it behind the door. Add spear throwers only with leftover coins. Upgrade the printer whenever the shop offers it; a later pink-tier printer in the full-clear video is treated as a huge income jump, which is the point of how to farm.
If the worm pressure starts before mortars exist, repair first. The video calls out a 25-second “releasing boss” countdown. That timer is your last printer upgrade and last repair, not a time to window-shop rares. Keep the door near 400 HP even while you are thinking about damage.
Phase 2 — mortars and a door that never slivers
Mortars are the first real answer to a healing million-HP worm. Place them where they cover the approach without standing in the chew lane. The full-clear run keeps buying another mortar and upgrading the ones already down instead of spreading into vanity units. If a farm gets chewed, put a farm back so income continues even if the worm clips inside — the video’s exact logic.
Door discipline stays the same as the dedicated how to protect the door article. Repair is a repeating input. Upgrading the door is optional cash. Letting HP fall because “mortars will kill it” is how full-clear attempts die on Easy. The worm’s heal plus chew outruns a mortar line that is not paid for.
Rare units appear as you climb. Take them when the printer is already upgraded and the door is healthy. Do not skip a mortar upgrade to gamble a rare you cannot place twice. The tier list and units pages are where those rares get ranked; this page only cares that they are extra DPS on top of mortars, not a replacement for printers.
Phase 3 — the blue unit and a filled plot
When cash is measured in the tens of thousands, the shop’s expensive blue fighter becomes the clear button. Cost is about 16k. Damage is about 120 per hit in footage. The all-levels video ends with a plot stuffed in neon blue, mortars still firing, printers still printing, door still repaired. That is the endgame layout best builds describes: fill empty tiles, do not leave decorative gaps, do not sell printers to afford one more statue.
Co-op on a 35-player server makes this phase easier if one player is glued to repair and the others dump blue units and mortars. It makes it harder if everyone rolls crates during the countdown. Gems wait until the bar is dead.
All difficulties, same rules
The ladder is multiple difficulties, not extra biomes. There is no Forest, Desert, Freezer, or Lava map in this place. You beat a mode, take the gem payout, expand the same bunker, and queue a harder mode. The video’s last step is Impossible, after which the plot is “completely maxed” and the worm is down.
What changes per difficulty is the speed of the chew, the size of the heal, and how greedy you can be with cash. What does not change:
- Printers before vanity DPS.
- Mortars as the mid-game spine.
- Door near 400, repaired on tick.
- Boss countdown ~25 seconds as a repair alarm.
- Rare units as supplements.
- Blue ~16k unit as the late spike.
- Gems after the clear, exclusive crates after the gem pile is real (the video waits until over 100 gems).
If a harder mode wipes you, do not invent a new map. Drop one difficulty, rebuild printers, and restock mortars. Check updates only if a 3 September 2026 patch note changed a price; the heal-and-chew design did not become a puzzle game.
Gems, exclusive crates, and what not to buy
A clear pays gems. Exclusive crates are the long-term chase, including flashy rolls the video reacts to after Impossible. Open them when the worm is dead and the door is irrelevant. Mid-wave rolling is a wipe mechanic you inflict on yourself.
There are no active promo codes as of September 2026. Like the experience and join the group for the advertised bonus. Anything that claims a Forest-map code is the other worm game. Stick to the codes hub.
Cash during the fight belongs to printers, repairs, mortars, rares, and the blue unit. It does not belong to cosmetics that do not shoot. If you are unsure, spend on income. Income buys the next mortar. The next mortar buys the heal race.
Boss-window script
When the countdown starts:
- Tap repair until the door is near 400.
- Confirm printers are still placed behind the bunker.
- Drop the highest DPS you can afford that is not a crate roll — mortar upgrade or blue unit.
- Stay in range of the repair prompt. The worm heals; you will need a second repair.
- After the HP bar hits zero, bank gems, then either climb a difficulty or open an exclusive crate.
That script is the whole “how to beat the worm” answer. The million-HP still looks intimidating until you notice the door is a few hundred points and the printer is the real boss fight. Kill the economy drought, then kill the cream worm.
Bring mortars to the heal race, keep the wood at 400, and spend the 16k blue unit only after printers already fund the next repair. Impossible is the same match as the first difficulty — just denser tiles and less room to ignore the door.
Frequently Asked Questions
Quick answers to the most common questions.
What is the Scary Worm's health?
Official stills show a bar around 748k toward 999,999, and the worm heals while it chews. Out-DPS the heal; do not race the door to zero.
Do I need the blue unit to clear?
Mortars plus printers can carry early difficulties. The ~16k blue unit (~120 damage) is the full-clear spike. See best builds for when to slot it.
When should I open exclusive crates?
After a clear, once gems are banked (full-clear footage waits until over 100). Never during the 25-second boss countdown.
Is Impossible a different map?
No. Difficulties are a ladder on the same bunker rules. This game does not use Forest, Desert, Freezer, or Lava maps.
What if the door dies with mortars still up?
That is still a loss. Repair on tick and keep HP near 400. Follow how to protect the door.