
Defend Your Base From Scary Worm How to Protect the Wooden Door
If the door hits zero, the worm wins — even with a maxed mortar line.
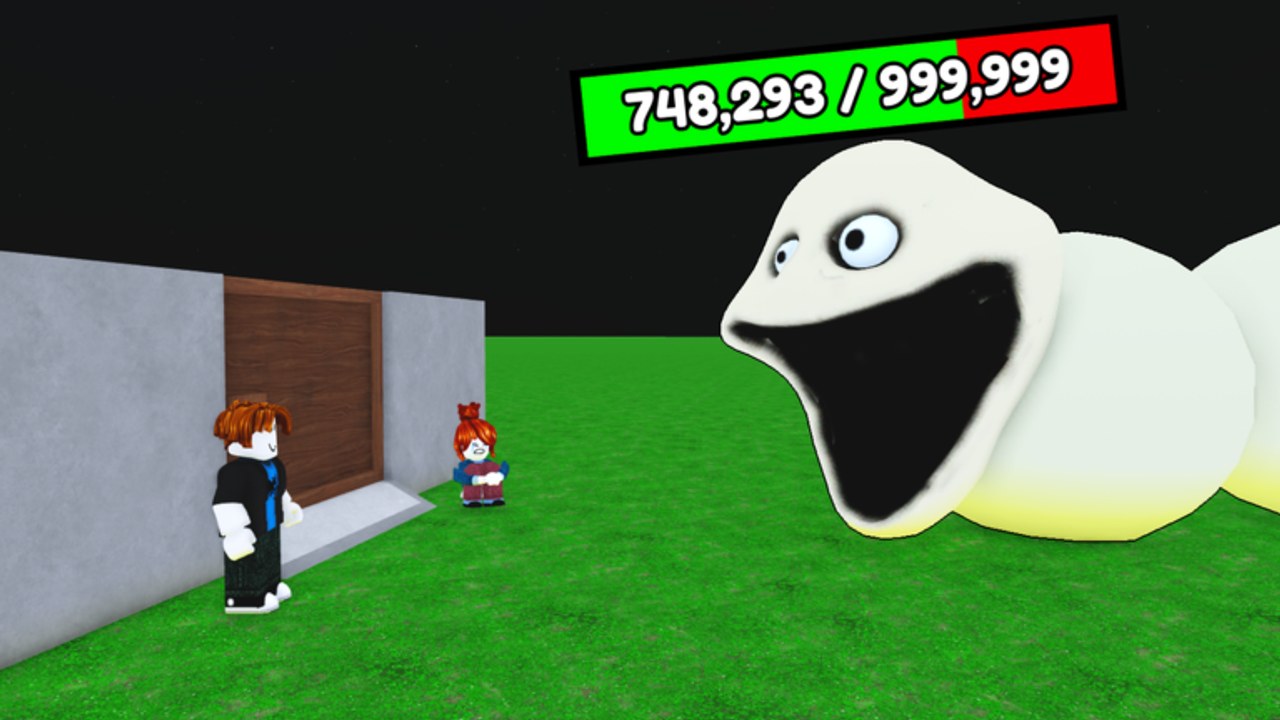
The wooden door is the fail condition in Defend Your Base From Scary Worm. Not your avatar, not the printer, not the rare unit, not the million-HP bar on the cream segmented boss. When the door is gone, the match is over. Everything else on this wiki — how to farm, best builds, the tier list — exists to make sure you can still tap repair with cash in the pocket while the worm chews.
Footage of real sessions repeats the same habit: keep the door near 400 HP. Players who wait for a sliver lose to heal-plus-chew. Players who treat 400 as a floor survive long enough for mortars and the blue unit to matter. This page is only about that floor.
Why the door, not the worm, is the clock
The Scary Worm is huge. Official stills show an HP bar around 748k on the way to 999,999. It heals. It walks a night-grass lane toward a concrete bunker. None of that is your loss condition. Your loss condition is a small wooden gate with a few hundred HP. The design is mean on purpose: looking at the boss makes you ignore the wood.
A boss countdown around 25 seconds is the loud alarm. The quiet alarm is every HP tick before that. If you only repair when the countdown starts, you are already late. Stand where the repair prompt can fire without a camera hunt. Controls explains that the prompt is a proximity interaction, not a unique hotkey we invented.
Repair versus upgrade
Repair restores HP on the door you have. It is the spam action. Pay it whenever the number drops. Early-session footage even pauses DPS talk to say the door has been repaired and should stay at 400 so it does not get too low.
Upgrade is a different shop decision. Some sessions show other door options in the buy list (one clip calls out a 220-cost door). That is optional cash. It is not a substitute for repair. A prettier or pricier door that you never tap still loses. In the first ten minutes, and honestly on most climbs, repair wins the argument. Spend leftover money on printers and turrets, not on a gate you cannot afford to repair.
If the shop ever makes you choose between one repair and one vanity spear, repair. If it makes you choose between one repair and one printer upgrade, repair first, then print — a dead door cannot collect the printer’s payout.
Keep ~400, not “full” and not “almost dead”
400 is a working band from footage, not a UI trophy. You do not need to sit at an exact maximum if the number is stable. You do need to refuse the slide. Once HP is in the low hundreds and falling, the worm’s chew outruns a single tap. Multiple repairs in the boss window are normal. Plan cash for that. How to farm exists because repair is a repeating tax, especially around wave 13.
Do not park units on the door tile if they block the prompt. Do not stand across the plot admiring a mortar. Do not open exclusive crates while the wood is ticking. Gems wait until the worm is dead; see how to beat the worm.
Stop the chew, do not tank the chew
The worm is trying to eat the door. DPS reduces how long that lasts. Repair covers the time DPS needs. You want both. A printer-only plot with no spears will watch the door get eaten. A spear-only plot with no printer will run out of repair money. The healthy pattern from getting started still applies: economy behind the bunker, cheap then expensive turrets covering the lane, human (or teammate) on the prompt.
Placement notes that actually protect wood:
- Printers and farms behind the door so a chew does not delete income.
- Spear throwers and mortars covering the approach, not stacked on the hinge.
- Empty space next to the door so you can walk into the repair prompt.
- No decorative clutter in the lane that hides the HP bar.
Co-op on a 35-player server should assign a dedicated repair player. How to play covers the social version: one person calls “repairing,” everyone else dumps DPS. If you are solo, you are the repair player. Builds that assume a friend will tap for you are how solo wipes happen. Use the build checklist before the countdown so you are not inventing a layout while the wood is moving.
What chewing looks like when you are losing
The bar ticks faster than you expected. You open the shop. You buy something that does not repair. You look at the worm’s giant HP. You hear the 25-second line. You finally tap repair on a door that is already a sliver. The heal wins. That sequence is the default death, not a rare bug.
Break it by making repair cheaper than thought. Stay in prompt range. Keep 400 as a reflex. Buy the next turret only after the number is stable. If you cannot afford both, you under-farmed — go back to printers, not to a new door skin.
This is not Defend Your Base from 67. There is no Forest map with a different gate. There is no code that maxes the wood. As of September 2026 there are no public promo codes at all; like the game and join the group for the advertised bonus, and ignore anything else on the codes hub until a real list exists.
Door checklist before every boss window
- Door HP is near 400, not “I will fix it in a second.”
- You are in range of the repair prompt (controls if you cannot find it).
- At least one printer is still behind the bunker.
- Turrets are shooting the lane, not blocking the hinge — confirm on the turret roster.
- Cash exists for a second repair if the heal is ugly.
- Nobody on the plot is mid-crate animation.
- If you have teammates, one of them has the repair job out loud.
Run that list, then fight. After the worm dies, you can spend gems. Until then the wooden door is the only HP bar that can end your night. Keep it near 400, repair on the tick, and let mortars do the bragging only while the wood still exists.
The worm can look like a smiling dough ball with a million HP and still lose to a boring repair habit. Let it chew air. Do not let it chew the last 400 points while you shop for a unit that cannot tap the prompt for you.
Frequently Asked Questions
Quick answers to the most common questions.
What HP should I keep the wooden door at?
Near 400. Repair as soon as it ticks down. Waiting for a sliver is how heal-plus-chew wins.
Is repairing the same as upgrading the door?
No. Repair restores HP. Upgrade is a separate shop cost. Pay repair first; buy turrets and printers with the rest.
Can maxed mortars save a dead door?
No. A destroyed door is a loss even if DPS is still firing. See how to beat the worm for the heal race after the door is stable.
Where should I stand to repair?
In range of the door prompt. Movement is standard Roblox — details on controls. Do not bury the hinge in units.
What should I check before the boss countdown?
Door near 400, printer alive, turrets in the lane, cash for a second repair. Use the build checklist so you are not improvising at 25 seconds.
Does co-op change the fail condition?
No. Up to 35 players can help tap repair, but your door still ends the run. Split roles in how to play.